Flightgear-2.8.0 with quad buffered stereo

In the article Flightgear with quad buffered stereo I have written about how to get quad buffered stereo to work with the famous flight simulator FlightGear. Recently FlightGear-2.8.0 has been released. The problem with quad buffered stereo still persists with FlightGear-2.8.0 .

One expects to enable stereoscopic mode in FlightGear starting it with the following line:

export OSG_STEREO_MODE=QUAD_BUFFER;export OSG_STEREO=ON; fgfs

When starting flightgear this way, one gets the following console output and no stereoscopic view:

Warning: detected OpenGL error ‘invalid operation’ after RenderBin::draw(,)

Getting FlightGear to work with quad-buffered stereo

The reason for the above error message and the resulting broken stereo mode is, that the stereo context does not get initialized properly. The details are described here: Flightgear with quad buffered stereo. Unfortunately the patch I proposed in the mentioned post does not work for flightgear-2.8.0. However, the good news is, it only required a slight modification, the WindowBuilder.cxx file no longer is in src/Main, but in the src/Viewer directory. You can download the new patch from here:  flightgear-2.8.0-stereoscopic.patch (2582 downloads )

Hopefully the patch finds its way into the next flightgear release.

As usual for quad buffered stereo, you have to use a professional graphics board that supports quad buffered stereo, like a NVIDIA Quadro FX or a Ati FireGL and proper display hardware, like shutter glasses, a HMD or a stereoscopic projection system, to benefit from it. To use the quad buffered stereo mode start flightgear with the environment variables mentioned above. Afterwards you probably have to enable quad buffered stereo mode by selecting the Stereoscopic View Options Item in the the View menu.

The Gentoo way

For gentoo users I have created an overlay. Like the previous one it contains patches and modified ebuilds for flightgear with working quad buffer support. You may get the overlay from here:  flightgear-2.8.0 overlay (2596 downloads ) Download the overlay and extract it in /usr/local/portage. Be sure to include the following line in your /etc/make.conf:

PORTDIR_OVERLAY=”/usr/local/portage”

Then emerge flightgear and enjoy it in three dimensions.

Have fun

Jürgen

1 Star2 Stars3 Stars4 Stars5 Stars (1 votes, average: 5.00 out of 5)
Loading...

Flightgear with VR920 headtracking

Recently I basically got Flightgear to work with quad buffered stereo. The only thing that was still missing for having the Vusix VR920 head mounted display fully supported in the flight simulator was headtracking.

However, with my new headtracking driver, VR920 headtracking in Flightgear is possible at last. A good part of the work has been done by Anders Gidenstam who provided the original Nasal module, the headtracking protocol description and usage instructions for his webcam based headtracking solution for Flightgear.

Download and copy the protocol description [download#59] to $FG_ROOT/Protocol. For me (gentoo system) this location is /usr/share/games/FlightGear/Protocol/, probably for many others it is /usr/share/FlightGear/Protocol/

Afterwards download unzip the modified Nasal module [download#58] to ~/.fgfs/Nasal. It is important to use your home directory and NOT i.e. /usr/share/games/FlightGear/Nasal/.

Then make sure that the vr920 headtracking driver runs in UDP mode. If running Flightgear on the same machine as the headtracking driver, which should be the usual case, just use 127.0.0.1 as destionation IP for the driver and use 4242 as destination port. These are the default settings of the driver.

Finally run Flightgear with these options: –generic=socket,in,<hz>,,<port>,udp,headtrack –prop:/sim/headtracking/enabled=1

If you also want to have quad buffered stereo with it (you need an nvidia quadro board, with assumably a pre G80 Chip or probably an ATI FireGL, never tried that, and a stereo enabled xserver) use the patch from FlightGear with quad buffered stereo. For instructions on how to get the xserver to work in stereoscopic mode see: Vuzix VR920 with Linux and active 3D stereo

For the described configuration you can use the following little startup script:

export OSG_STEREO_MODE=QUAD_BUFFER
export OSG_STEREO=ON
fgfs –generic=socket,in,25,,4242,udp,headtrack –prop:/sim/headtracking/enabled=1

Now have much fun and enjoy a new experience with your VR920 and Flightgear in stereo with headtracking.

best regards

Jürgen

1 Star2 Stars3 Stars4 Stars5 Stars (1 votes, average: 5.00 out of 5)
Loading...

VRTrack 1.0 – headtracking driver for the vr920 HMD

As I promised in New version of the vr920 headtracking driver coming soon here is the new version of my headtracking driver for the Vuzix VR920 iwear for Linux. It calculates yaw, pitch and roll from the accelerometer and magnetometer data (The device has got three of each). This makes a 3DOF tracking possible and allows you to look around in a 3D Scene.  In example you can use the driver with my stereoscopic image viewer SIV. The driver averages the sensor readings with an improved algorithm, which gives a far smoother experience than with the initial driver version. The driver package consists of a daemon which can be run in the background and for convenience a basic control application that enables one to easily tweak the various driver settings and to callibrate the device. For general Information on how to use the device with Linux see: Vuzix VR920 with Linux and active 3D stereo.

The driver provides the trackingdata in different formats to the application using it. It always writes the data to /dev/headtracking. A line read from /dev/vrtrack consists of six floats that correspond a sensor reading in this format:

yaw pitch roll x y z

Yaw, pitch and roll are angles from 0 to 360 degrees. X, y and z are always zero for the vr920, since it only supports three degrees of freedom. These values are reserved for future devices which may support six degrees of freedom, in the hope to propose a standard for tracking devices.

The driver can scale the readings and invert the axes independantly to get the needed value range for the used application and a pleasant experience.

For maximum compatibility with existing applications there are four other modes of operation available that can be enabled separately:

  • Joystick emulation
    The driver emulates a joystick device /dev/input/jsX. The readings for yaw, pitch and roll are the X,Y and Z axis of the emulated joystick. This may be used to enable basic headtracking support in games that do not natively support headtracking.
  • Mouse emulation
    The driver emulates a joystick device /dev/input/mouseX. The readings for yaw and pitch are being translated to X and Y of the mouse device, so when you look right the mouse pointer moves to the right and when you look up the pointer moves upwards and vice versa.  This may also be used to enable basic headtracking support in games that do not natively support headtracking. It can also be used to just control the mouse pointer of the window system. Controlling the viewport of the window system can also be a resonable purpose. With the new MPX extension in xorg this may be possible.
  • UDP – network
    In UDP mode the driver sends the tracking data via network as UDP unicast. The approach to send the data out via network makes the language used for writing the application independant from the language used for developing the driver. The packet sent to the clients contains the three angles, yaw, pitch and roll and x,y and z as 32 bit fixed point in Q16.16 format. This mode may i.e. used to control flightgear.
  • Multicast – network
    In multicast mode the driver sends the tracking data via network as UDP multicast, thus many clients may read the data, which makes parallelization more possible, i.e. one could use one machine for rendering and another machine for calculations. In addition to this, the approach to send the data out via network makes the language used for writing the application independant from the language used for developing the driver. The tracking data sent to the clients contains the three angles, yaw, pitch and roll and for easy usage a viewmatrix, one can directly use with scenegraph libraries. If you intend to develop an application using the headtracking of the VR920 see the file democlient.cpp included in the download for details on how to get the data into your application. This mode is used by the stereoscopic image viewer SIV.
Below is a screenshot of the control application during callibration of a vr920 device:
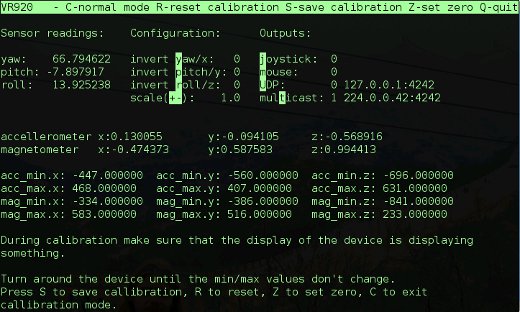
control_app

Important note: During calibration make sure that the display of the device is displaying something. Since the displays not only showing a blue screen influences the sensor data (at least with my device) you’ll end with wrong calibration else. You may use i.e. nvidia-settings to ensure this. For detailed usage instructions see the readme included in the download.

Download:

I decided to publish the driver under the creative common noncommercial license. You may download the full source from here: vr920-driver(source) (4727 downloads ) , an x86_64 binary from here: vr920-driver(x86_64 binary) (4140 downloads ) , or an i686 binary from here: vr920-driver(i686 binary) (4297 downloads ) . An Archlinux PKGBUILD provided by Feilen is available here: aur.archlinux.org More binary/distribution specific formats may be available in the future. The x86_64 binary has been build on an up to date gentoo system, the i686 binary on ubuntu hardy. For the i686 binary you may install libconfig++ i.e. libconfig++8_1.3.2-2 from here: libconfig++ If none of the binaries works for you, you may have to build from source…

You need to have libusb, libconfig++, libfuse and libcurses installed on your system. For ubuntu users I included the small shell script ubuntu_install_deps.sh that installs the dependencies. Maybe it works also for for other Debian-based distributions. Gentoo users just have to make sure that  libusb, ncurses, fuse, and libconfig have been emerged. Your kernel version has to be at least 2.6.31 and you must have cuse enabled in your kernel.

Footnote:

If you like the driver, feel free to link to www.mygnu.de. If you developed an application using the tracking data provided by the driver please leave a comment, because then I can review the application and eventually write about it. To request commercial licenses contact us at info(at)mygnu.de. Well, if you just want to support our work on MyGNU.de use the donate button 😉

best regards

Jürgen

1 Star2 Stars3 Stars4 Stars5 Stars (1 votes, average: 5.00 out of 5)
Loading...

Vultures-2.2.100 ebuild for gentoo

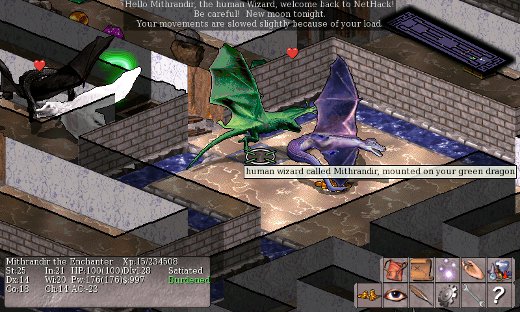
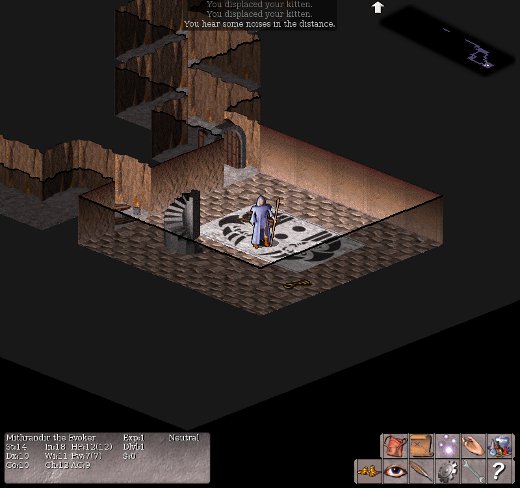
Some years ago I played nethack on my old PC. Nethack is a Diablo like RPG that was originally released in 1987. Before playing a game, you have to create a character. You can choose between different character classes: Archeologist, Barbarian, Caveman, Healer, Knight, Monk, Priest, Ranger, Rogue, Samurai, Tourist Valkyrie and Wizard. These classes have different abilities in fighting and using magic. Afterwards you can descent to the dungeon where you have to retrieve the Amulet of Yendor and defeat the bad Moloch. For some more information on gameplay and how to win see the links below the post.

By chance I discovered a maemo package for vultures eye which I installed on my Nokia N810. Vultures eye is a nice graphical frontend for nethack.

vultureseye-n810

Which dragon shall I ride? - Vultureseye on the N810

Then I felt it would be nice to have Vultures Eye also on my PC. With a large screen and real mouse/keyboard input the game is easier to play, than on the small n810s touchscreen. Since the latest available Gentoo ebuild was far out of date and the sources for it are no longer available I wrote a new ebuild based upon the old one. You may download my new ebuild from here: [download#38]

vultureseye

vultureseye on gentoo

To use the ebuild it just copy it to /usr/local/portage/games-roguelike/vultures/. You probably have to create the directory. Then run

ebuild /usr/local/portage/games-roguelike/vultures/vultures-2.2.100.ebuild digest

Be sure to include the following line in your /etc/make.conf.

PORTDIR_OVERLAY=”/usr/local/portage”

Then just emerge vultures and enjoy many YASDs. But beware, one can get quite addicted to this game.

Jürgen

Resources:

NetHack

beginner’s-guide-to-nethack

how-to-win-at-nethack-wishes

vultures-eye-nethack-nice-graphics

nokia-n900-downloads

gentoo bugzilla

1 Star2 Stars3 Stars4 Stars5 Stars (1 votes, average: 5.00 out of 5)
Loading...

siteinfo

Translator